What Is Clipify?
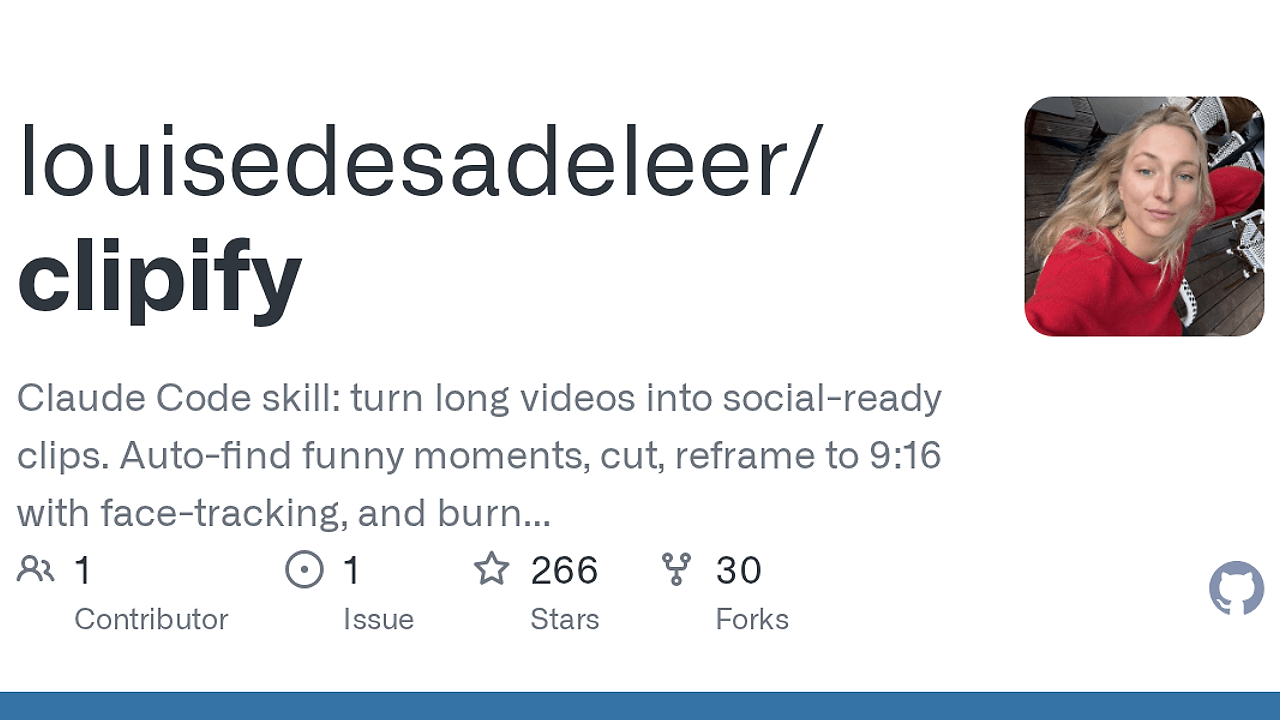
Clipify is a Claude Code skill and one of the best AI Video Clipping tools for indie hackers, creators, and editors making social clips from long-form footage. Built by Louise de Sadeleer, Clipify transcribes video with Whisper, surfaces 3–5 candidate moments, and renders 9:16 clips locally with no cloud APIs; the README claims about 20 seconds of compute for a 20-second clip on Apple Silicon.
The tool is built for talking-head interviews, podcasts, and two-person setups where transcript quality, speaker turns, and subtitle timing matter more than fancy effects. It behaves like a terminal-first media pipeline wrapped in a Claude Code skill, which keeps the workflow predictable and avoids the SaaS lock-in common in auto-clip products.
Quick Overview
| Attribute | Details |
|---|---|
| Type | AI Video Clipping |
| Best For | Indie hackers, creators, and editors making social clips from long-form video |
| Language/Stack | Claude Code, ffmpeg, Whisper, Python, ASS subtitles, Apple Silicon VideoToolbox |
| License | MIT |
| GitHub Stars | N/A on the page snapshot |
| Pricing | Open-Source |
| Last Release | N/A |
Who Should Use Clipify?
Clipify fits people who want deterministic local clip generation instead of a hosted SaaS workflow. It is especially useful when you already work inside Claude Code and want the agent to handle the tedious parts of clip selection, reframing, and caption rendering.
- Solo founders cutting LinkedIn and X clips from webinars, demos, or founder interviews who need fast output without paying for another monthly editor.
- Content operators who publish a lot of talking-head material and want transcript-driven candidate selection instead of manually scrubbing timelines.
- Technical creators who prefer
ffmpeg, local scripts, and reproducible renders over opaque browser editors. - Small media teams producing repeatable vertical clips from a fixed camera setup where speaker tracking and captions matter more than creative transitions.
Not ideal for:
- Music videos or montage-heavy edits where scene changes, b-roll timing, and nonlinear transitions matter more than dialogue.
- Teams that need browser-based collaboration with shared review links, comment threads, and cloud asset management.
- Users without local runtime dependencies like
ffmpeg, Whisper, and a compatible Python environment.
Key Features of Clipify
- Transcript-first clip discovery — Clipify runs Whisper over the source video and scans the transcript for punchlines, reversals, awkward pauses, and audio peaks. That gives you 3–5 candidate clips with timestamps instead of forcing you to manually hunt for highlights.
- Local-only processing — Clipify keeps the entire pipeline on your machine and does not call cloud APIs. That matters if you care about privacy, predictable latency, or avoiding per-minute transcription bills.
- 9:16 reframing for talking heads — Clipify converts 16:9 footage into vertical social video by hard-cut panning between speakers or using split-screen when both faces should stay visible. The output is optimized for TikTok, Reels, and LinkedIn shorts.
- Word-by-word subtitles — Clipify burns opus-style captions directly into the render with a big white base, yellow active-word highlight, and subtitle styles that can be tuned to match a reference image. The captions are generated from Whisper JSON and rendered through ASS, not hand-timed in an editor.
- Motion-based speaker detection — Clipify avoids a face detection model and instead estimates motion energy inside manually chosen mouth-and-chin regions. For static-camera interviews, that keeps the logic simple and fast while still tracking who is speaking.
- Hardware-accelerated decoding — On macOS, Clipify uses VideoToolbox for decode acceleration, which is why the README reports roughly 20 seconds of work for a 20-second clip on Apple Silicon. On Linux and Windows, the same workflow works after removing the
-hwaccel videotoolboxflags. - Claude Code-native workflow — Clipify installs as a skill under
~/.claude/skills/clipify, then exposes/clipifyinside Claude Code. If your day already revolves around Claude, it drops into the agent loop instead of forcing a separate UI.
Clipify vs Alternatives
| Tool | Best For | Key Differentiator | Pricing |
|---|---|---|---|
| Clipify | Local, transcript-driven social clip generation | Runs inside Claude Code and keeps the full render pipeline on-device | Open-Source |
| Opus Clip | SaaS clip repurposing for marketers | Fully hosted workflow with minimal setup and a polished web app | Freemium |
| Descript | Podcast and video editing with text-based workflows | Strong timeline editor plus transcription and collaborative editing | Freemium |
| CapCut | Fast social video editing with templates | Broader consumer editing suite with templates, effects, and mobile-first UX | Freemium |
Pick Opus Clip if you want a hosted product that handles most decisions for you and you do not want to maintain local dependencies. Pick Descript if your workflow needs a real editor, text-based timeline changes, and team collaboration, not just clip extraction.
Pick CapCut if you care about templates, effects, and a broad social-video feature set more than automation. Pick Clipify when you want deterministic output from a local ffmpeg pipeline and prefer to keep the entire process inside Claude Code. If you already use Claude Code Canvas or Claude Context Mode to manage Claude sessions, Clipify fits that same terminal-first operating style but handles the media work itself.
How Clipify Works
Clipify is structured as a Claude Code skill plus a small set of Python and ffmpeg helpers. The main idea is simple: Claude orchestrates the workflow, Whisper turns speech into text, and ffmpeg does the actual cutting, reframing, and subtitle burn-in.
The clip discovery phase reads the transcript and scores moments that look narratively useful. It is not doing generic video understanding, which is why the repository focuses on talking-head footage where punchlines, pauses, and turn-taking are easy to infer from speech and audio peaks.
Once you pick a candidate, Clipify builds a render plan from the selected timestamps. The pan logic uses two manually defined regions of interest around the speakers' mouth and chin areas, measures frame-difference motion per ROI, and emits a hard-cut x-expression so the crop can follow the active speaker without a face model.
/clipify
# paste the path to your source video when Claude Code prompts you
That command starts the skill from inside Claude Code and kicks off the transcript, candidate selection, aspect-ratio choice, subtitle style prompt, and final render. Expect the result to land in <source-video-dir>/clipify_out/, with the render tuned for 9:16 unless you choose a different output format.
The design is intentionally boring in the best way. Clipify avoids OpenCV, avoids a cloud render queue, and leans on standard media primitives like Whisper JSON, ASS subtitles, and ffmpeg filters so the output is reproducible and easy to debug.
Pros and Cons of Clipify
Pros:
- Fully local pipeline — No cloud API calls, which keeps privacy, latency, and operating cost under control.
- ffmpeg-native output — Final renders are produced by standard media tooling, so results are deterministic and scriptable.
- Good fit for dialogue — Transcript scanning plus motion-based speaker selection works well for interviews, podcasts, and two-person rooms.
- Subtitle styles are configurable — Opus, karaoke, and minimal caption modes make the output adaptable to different social platforms.
- Fast on Apple Silicon — Hardware decode on macOS keeps the clip pipeline short for short-form outputs.
- Claude Code integration — The
/clipifyentry point keeps the workflow in the same interface where many developers already iterate.
Cons:
- Narrow content sweet spot — Clipify is tuned for static-camera talking-head footage, not fast b-roll edits or cinematic sequences.
- Manual setup required — You need
ffmpeg, Whisper, Python 3, andnumpyinstalled locally. - macOS is the smooth path — Linux and Windows work, but the default VideoToolbox acceleration flags are macOS-specific.
- No collaborative SaaS layer — There is no shared review UI, permissions model, or cloud asset library.
- Speaker logic is heuristic — Motion-based ROI detection is fast, but it is less general than a dedicated multi-person tracking stack.
Getting Started with Clipify
Getting started with Clipify is a two-step job: install the skill into Claude Code, then satisfy the local media dependencies. After that, /clipify becomes available as a slash command and the rest of the workflow runs from the Claude prompt.
git clone https://github.com/louisedesadeleer/clipify.git ~/.claude/skills/clipify
brew install ffmpeg
pip install openai-whisper numpy
After the dependencies are installed, restart Claude Code and run /clipify. Clipify will ask for a source video path, generate 3–5 candidate clips, and then walk you through aspect ratio, speaker framing, and subtitle style before rendering the final file.
If you are not on macOS, Clipify still works, but you may need to remove the -hwaccel videotoolbox decode flags from the ffmpeg path. The rest of the stack stays the same, which makes the repo easy to port into a Linux workstation or CI-like environment.
Verdict
Clipify is the strongest option for locally generated social clips when you already work inside Claude Code and want deterministic ffmpeg output instead of SaaS black boxes. Its best strength is the transcript-plus-motion pipeline; its caveat is that it is tuned for talking-head footage, not arbitrary b-roll edits. Recommended for developers who want full control.